参考文献:《奔跑吧Linux内核》,张天飞著
1.简介
在Linux内核中,小块内存分配大量使用slab/slub分配器,slab/slub分配器提供了一个内存检测的小功能,很方便在产品开发阶段进行内存检查。内存访问中比较容易出现错误的地方如下。
- 访问已经释放的内存
- 越界访问
- 释放已经释放过的内存
2.使用
2.1 内核配置
使用slub_debug,首先需要重新配置内核选项,打开CONFIG_SLUB和CONFIG_SLUB_DEBUG_ON这两个选项。
# 修改使用的defconfig文件
CONFIG_SLUB=y
CONFIG_SLUB_DEBUG_ON=y
CONFIG_SLUB_STATS=y
2.2 编译生成slabinfo
通过slub.ko模拟内存异常访问,有些可以直接显示,有些需要通过slabinfo -v来查看。
使用如下命令编译生成slabinfo
# cd kernel/common/tools/vm
# aarch64-linux-gnu-gcc -static slabinfo.c -o slabinfo
2.3 修改commandline
在内核commandline中添加“slub_debug”字符串来打开该功能。
修改device/xxx/BoardConfig.mk,添加BOARD_KERNEL_CMDLINE += slub_debug
3.示例
3.1 示例源码
在kernel/common/drivers/下面新建slub_test目录,在目录下面新建如下三个示例
// slub_out_bounds.c
#include <linux/kernel.h>
#include <linux/module.h>
#include <linux/init.h>
#include <linux/slab.h>

static char *buf;

static void create_slub_error(void)
{
    buf = kmalloc(32, GFP_KERNEL);
    if (buf) {
        // out-of-bounds
        memset(buf, 0x55, 36);
    }
}

static int __init my_test1_init(void)
{
    printk("figo: my module init \n");
    create_slub_error();
    return 0;
}

static void __exit my_test1_exit(void)
{
    printk("goodbye \n");
    kfree(buf);
}

MODULE_LICENSE("GPL");
module_init(my_test1_init);
module_exit(my_test1_exit);
// slub_double_free.c

#include <linux/kernel.h>
#include <linux/module.h>
#include <linux/init.h>
#include <linux/slab.h>


static char *buf;

static void create_slub_error(void)
{
    buf = kmalloc(32, GFP_KERNEL);
    if (buf) {
        // double free
        memset(buf, 0x55, 32);
        kfree(buf);
        printk("figo: double free test\n");
        kfree(buf);
    }
}

static int __init my_test2_init(void)
{
    printk("figo: my module init \n");
    create_slub_error();
    return 0;
}

static void __exit my_test2_exit(void)
{
    printk("goodbye \n");
    kfree(buf);
}

MODULE_LICENSE("GPL");
module_init(my_test2_init);
module_exit(my_test2_exit);
// slub_use_after_free.c

#include <linux/kernel.h>
#include <linux/module.h>
#include <linux/init.h>
#include <linux/slab.h>

static char *buf;

static void create_slub_error(void)
{
    buf = kmalloc(32, GFP_KERNEL);
    if (buf) {
        // use after free
        kfree(buf);
        printk("figo:access free memory \n");
        memset(buf, 0x55, 36);
    }
}

static int __init my_test3_init(void)
{
    printk("figo: my module init \n");
    create_slub_error();
    return 0;
}

static void __exit my_test3_exit(void)
{
    printk("goodbye \n");
    kfree(buf);
}

MODULE_LICENSE("GPL");
module_init(my_test3_init);
module_exit(my_test3_exit);
新建Kconfig文件,内容如下
#
#   SLUB_DEBUG test driver
#
menu "SLUB_DEBUG TEST Driver"
comment "SLUB_DEBUG TEST Driver"

config SLUB_OUT_BOUNDS
    tristate "SLUB_OUT_BOUNDS support"
    default m

config SLUB_DOUBLE_FREE
    tristate "SLUB_DOUBLE_FREE support"
    default m

config SLUB_USE_AFTER_FREE
    tristate "SLUB_USE_AFTER_FREE support"
    default m

endmenu
新建Makefile文件,内容如下
 drivers/slub_test/Makefile
#
# Makefile for the slub
#

obj-$(CONFIG_SLUB_OUT_BOUNDS) += slub_out_bounds.o
obj-$(CONFIG_SLUB_DOUBLE_FREE) += slub_double_free.o
obj-$(CONFIG_SLUB_USE_AFTER_FREE) += slub_use_after_free.o
修改drivers/Kconfig文件,使添加的Kconfig起作用,在最后一行endmenu前添加source "drivers/slub_test/Kconfig"
脚本中的source意味着引用新的Kconfig文件。
为了使编译命令作用到slub_test目录,修改drivers/Makefile文件,在最后一行添加obj-y += slub_test/
然后编译kernel,重新烧写boot.img.
将生成的三个ko&slabinfo文件通过adb push到开发板。
3.2 开发板测试
测试1:越界访问

这里的越界访问问题并没有检测到,很可能是编译优化的问题。
根据文章Linux内存管理 (22)内存检测技术(slub_debug/kmemleak/kasan) 的说法,应该是
虽然kmalloc申请了32字节的slab缓冲区,但是内核分配的是kmalloc-64。所以memset 36字节不会报错,将36改成大于64即可。
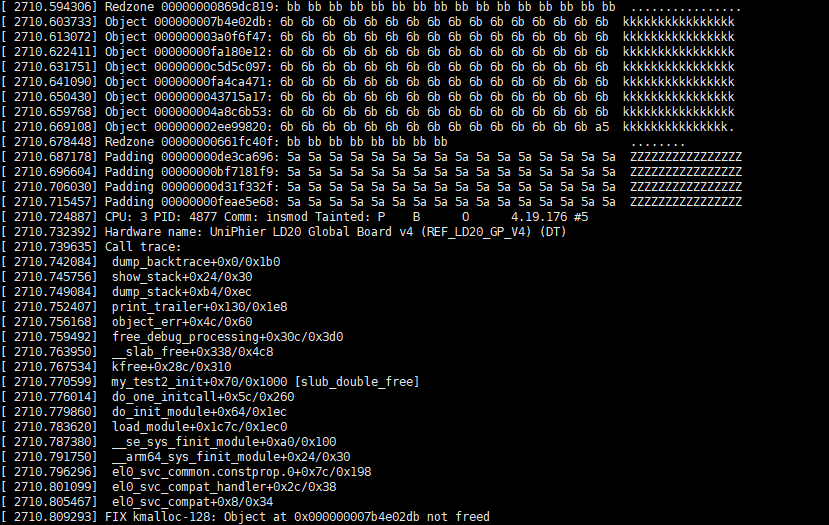
测试2:重复释放
这是一个重复释放的例子,错误很明显,所以不用运行slabinfo程序内核就能马上捕捉到错误。


这是很典型的重复释放的例子,错误显而易见,可是在实际工程项目中没有这么简单,因为有些内存访问错误隐藏在层层的函数调用中或经过多层指针引用。
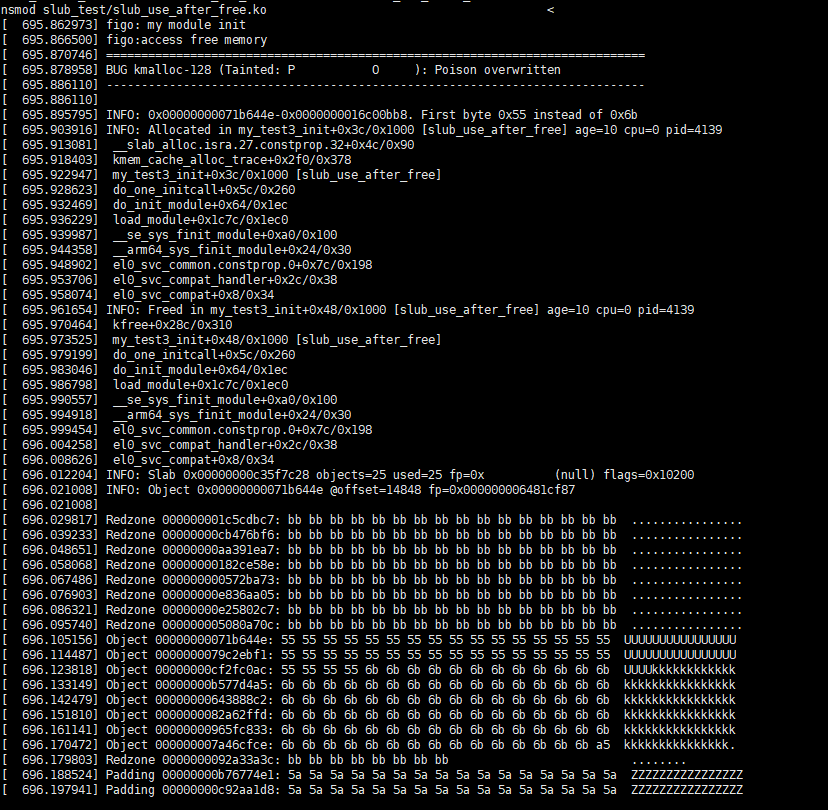
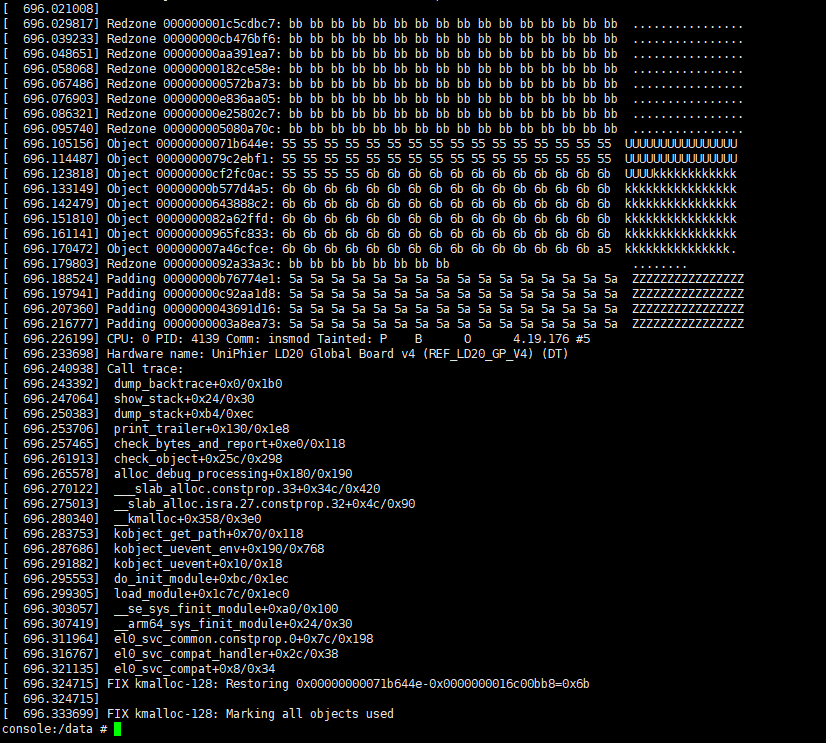
测试3:访问已经释放的内存
下面是一个典型的错误,访问了已经释放的内存


评论 (0)